![B6 [2005 - 2010]](/uploads/Volkswagen_Passat_B6_2005_-_2010_.jpg)
Tool:
- Torx wrench (sprocket) T5
- Socket spanner tubular 6 mm
- Key extension
- Pure cotton gloves
- Small flat screwdriver
- Torx wrench (sprocket) T27
Parts and consumables:
- Halogen low beam lamp (VAG N10320102)
- Halogen high beam lamp (VAG N10320101)
- Parking light bulb (VAG N0177535)
- Discharge lamp (VAG N10566103)
- Parking light bulb for headlamp with xenon light (VAG N01775310 / N01775311)
- Rags / Towel
- Block headlamp left xenon (VAG 3C0941753K / 3C0941753M)
- Block headlight right xenon (VAG 3C0941754K / 3C0941754M)
- Block headlight left halogen (VAG 3C0941005AА / 3C0941005AE)
- Headlight block right halogen (VAG 3C0941006AA / 3C0941006AE)
- Wire
- Distilled water
- Detergent degreaser
Notes:
To replace headlight bulbs in vehicles equipped with halogen headlamps, the bulbs can be replaced without removing the headlight. How to do this is described below. To replace lamps with gas discharge (xenov) lamps, due to the design features, the headlight must be completely removed from the vehicle. In addition, replacing xenon lamps sometimes does not completely solve the problem of weak head light, then it is necessary to check the rest of the parts and clean the lenses.
Over time, the luminous intensity of the headlamps decreases markedly. The main reasons are the degradation of the lamp itself, as well as the contamination of the lens. The headlights can start to flicker, change color to pinkish and simply fail. These are sure signs for replacing a lamp, as well as checking the rest of the headlight unit.
Weak headlights
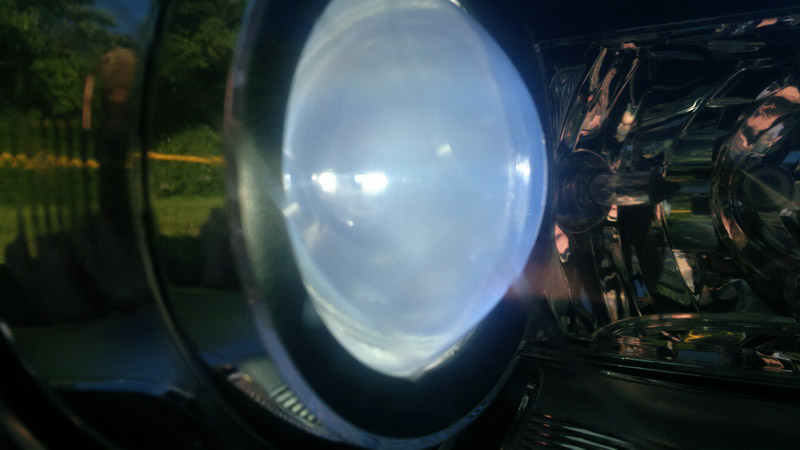
Hazy lens of a xenon headlight lamp
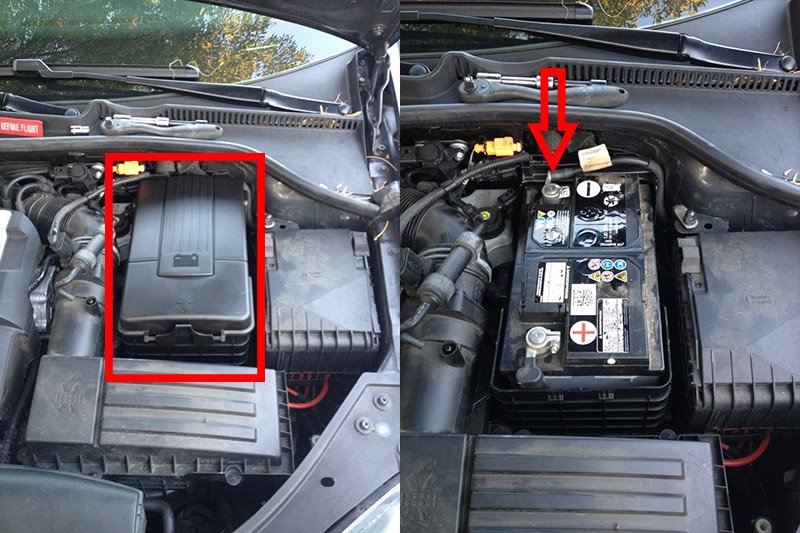
Before carrying out work, disconnect all electrical consumers in the car and switch off the ignition. Open the battery cover and disconnect the minus terminal.
Replacing halogen headlamps without removing the headlight unit Volkswagen Passat B6
1. To replace all three types of lamps, you must remove the cover of the required lamp.
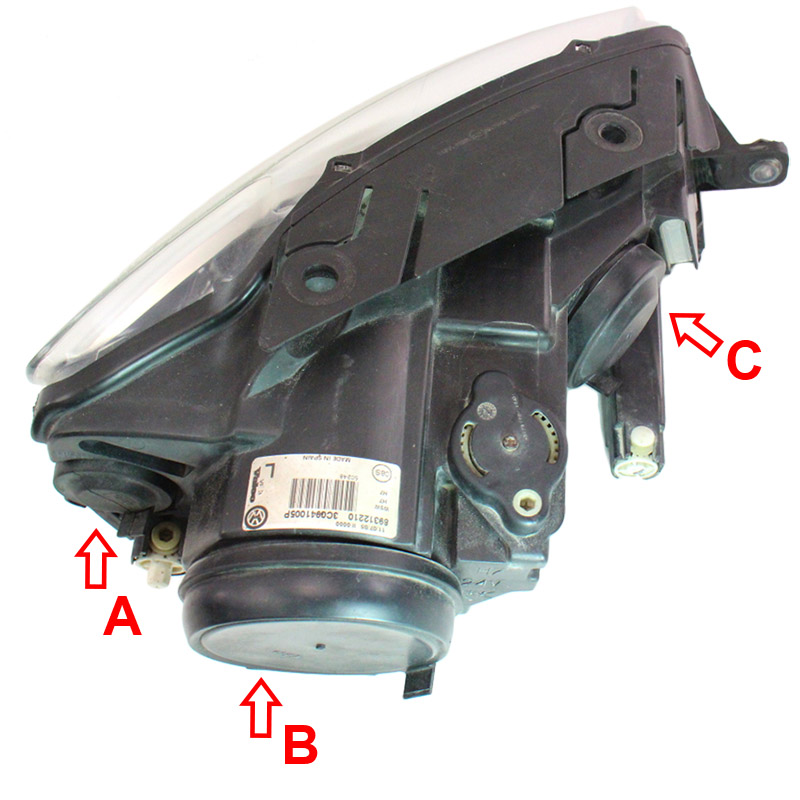
- A - parking light lamp;
- B - low beam lamp;
- C - high beam lamp.
Note:
An example is shown on the left headlight. The location for the right headlight is symmetrical. All three types of lamps vary in approximately the same way.
2. Pry the cover of the desired lamp, place your hand behind the headlamp, tilt the cover from side to side and pull it out.
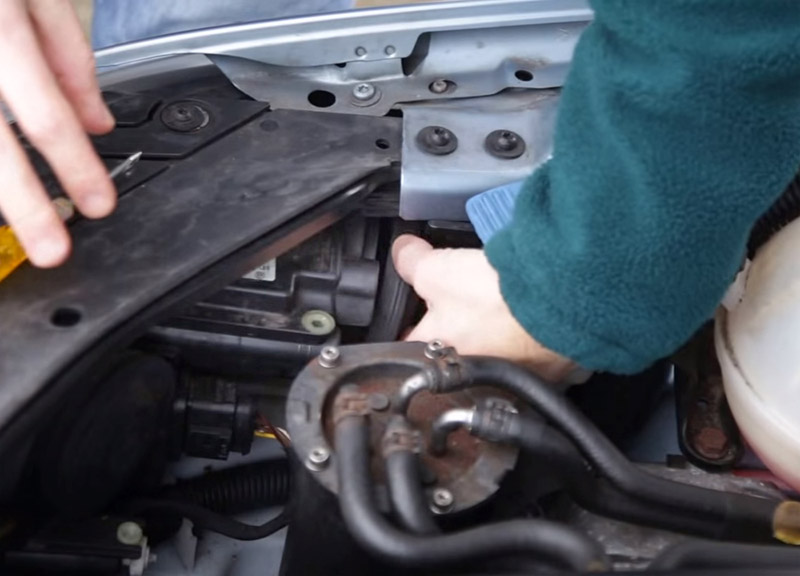
3. Place your hand in the lamp niche.
On the Hella headlamp, grope and turn the bulb holder and turn it counterclockwise. Remove the bulb holder. Be careful not to damage the wires.
On the Valeo headlamp, pull the wiring harness in the rearward direction. After removing the terminal, remove the lamp by the plug from the reflector.
Note:
The type of lamp base for Valeo and Hella headlights is different. At the Valeo headlight, the dipped beam is placed in a niche and then a terminal is connected to it. On the Hella headlamp, the dipped beam is inserted into a plastic base that is already wired.
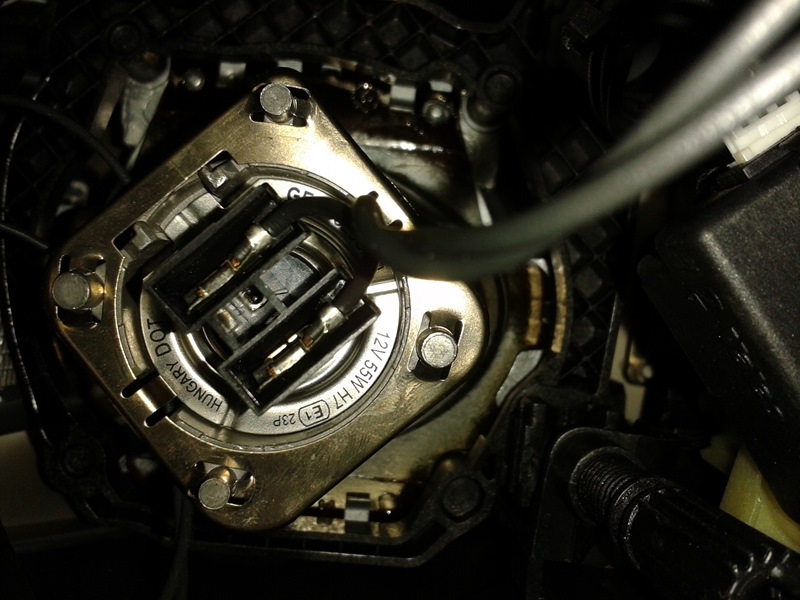
Valeo low beam lamp base
4. Remove the lamp from the socket.
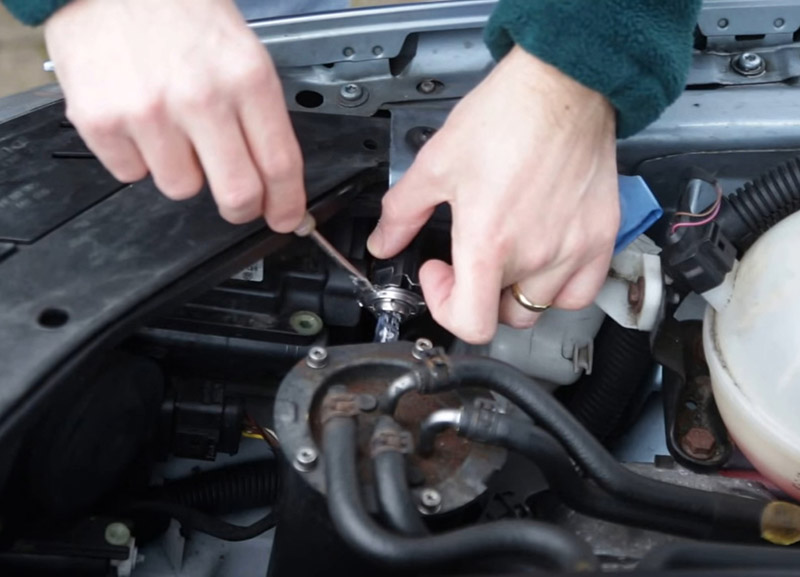
5. Replace the lamp with a new one and insert it into the socket.
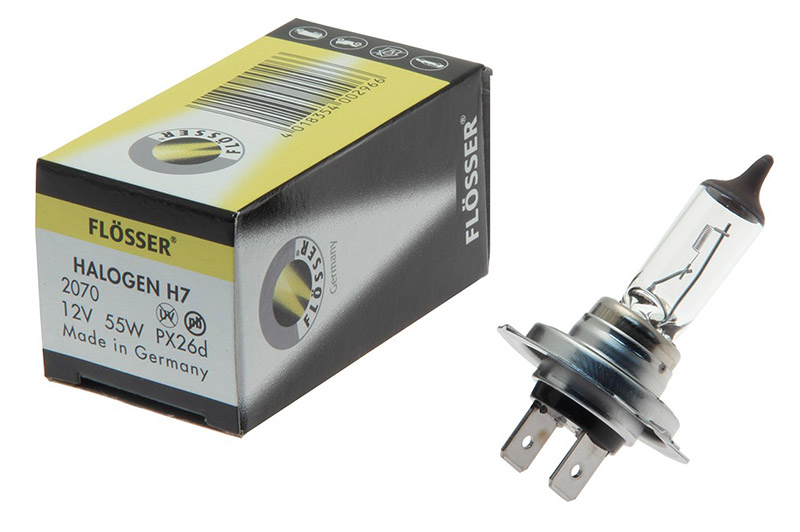
Bulb H7 12V 55W low/high beam headlights
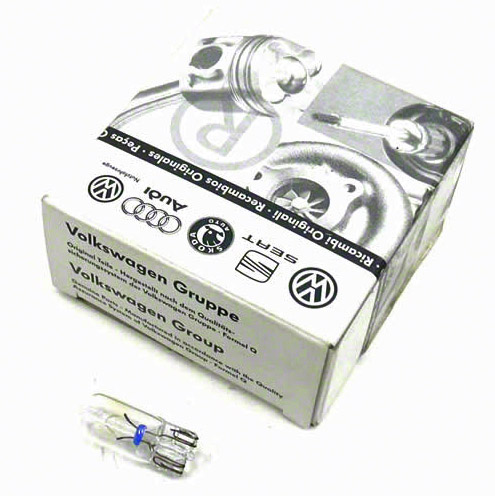
Lamp baseless 5W headlight parking light
6. Insert the chuck back and turn it clockwise until it stops. In a Valeo headlight, the lamp must be inserted to the end and the wire terminal must be connected. Close the niche tightly with a lid so that dirt and moisture do not get there.
7. Check the operation of the headlight, including all its functions.
8. Check the headlight setting, adjust if necessary.
Warning:
It is highly recommended that you wear clean cotton gloves when handling the lamps. In addition to the fact that the lamps are quite fragile and can burst right in the hand, this is also important for a new lamp. It is undesirable to touch it with your bare hands, as dirt and grease on the glass of the lamp will significantly reduce the lamp life.
Replacing bulbs in a car equipped with xenon headlights (with the removal of the headlamp unit) Volkswagen Passat B6
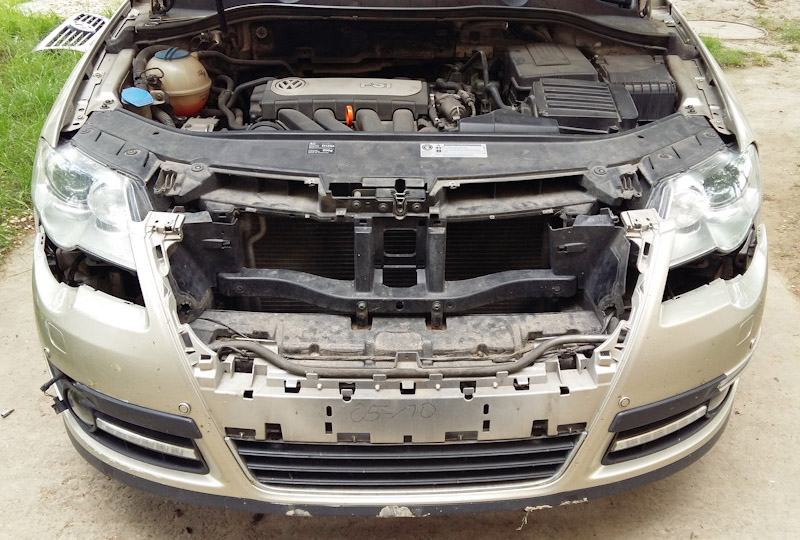
1. To replace the bulbs and gain access to the lens, you must remove the front bumper trim and grille as described in this article .
2. Remove the two screws for the headlight unit upper mounting.

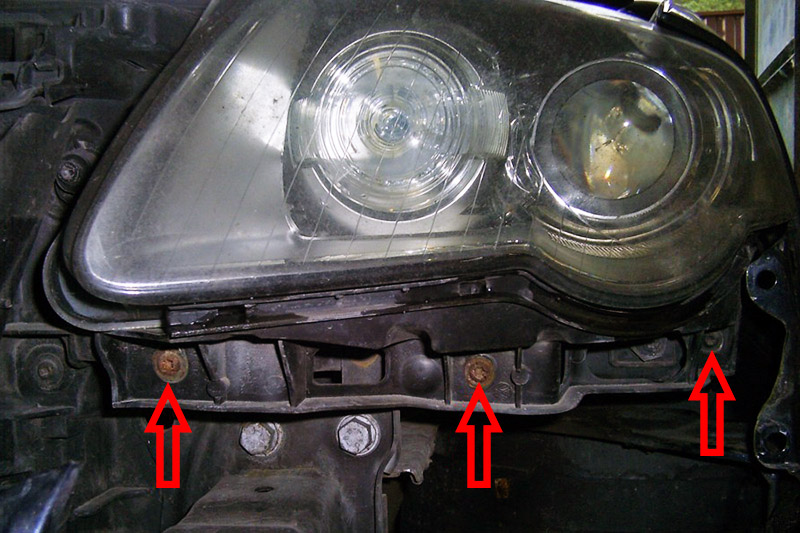
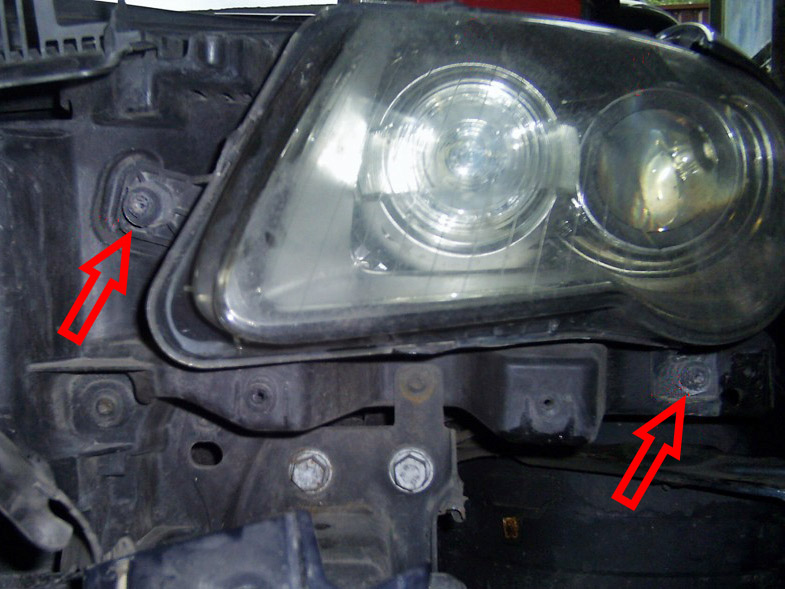
3. Unscrew the three guide bolts under the headlight and remove the strip.
4. Remove the two side headlight mounting screws.
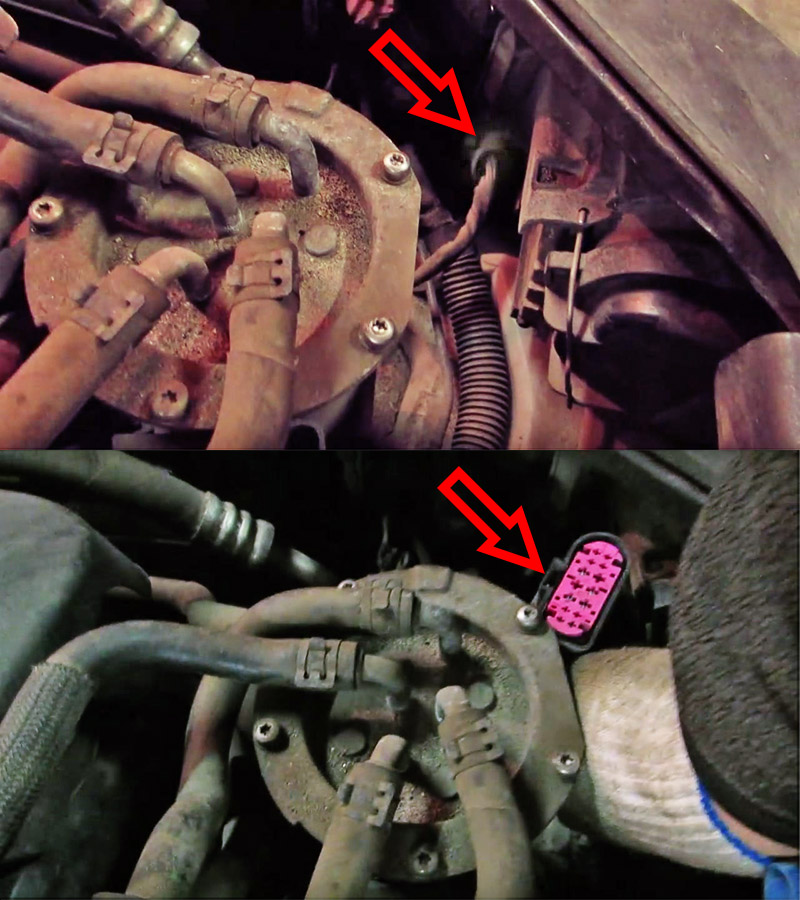
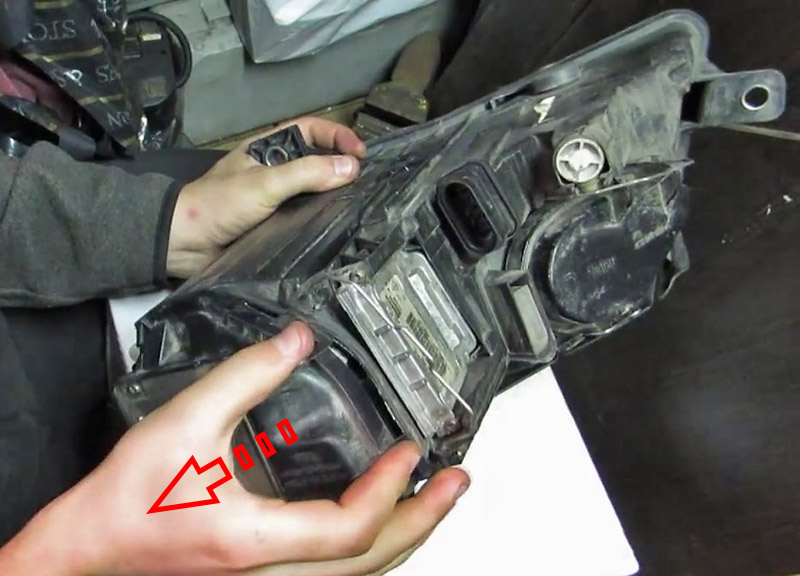
5. Disconnect the headlamp power lead.
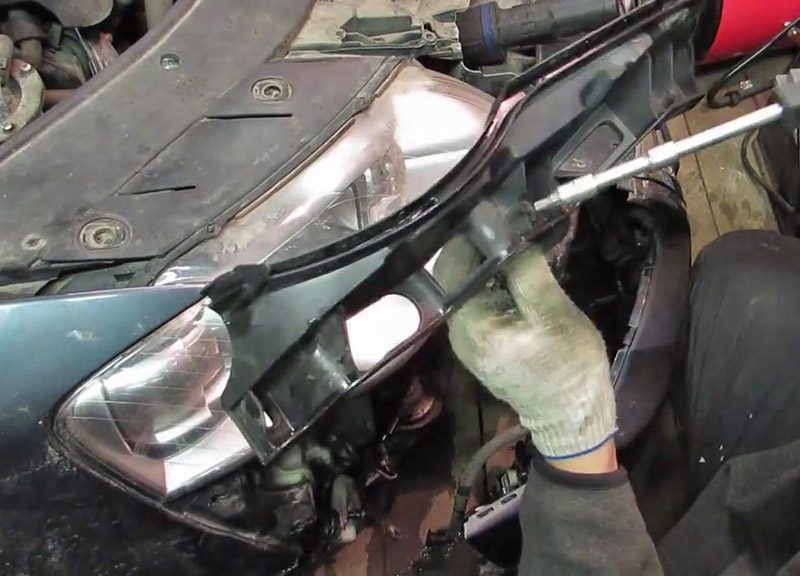
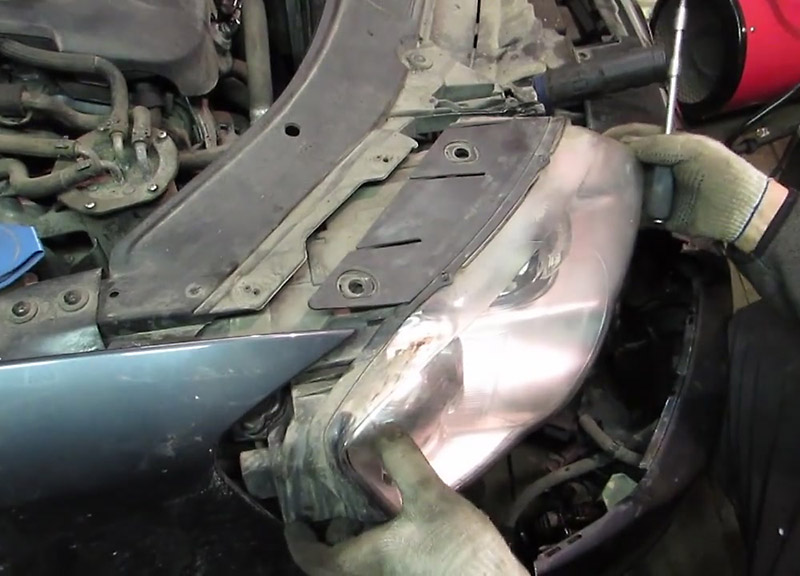
6. Remove the headlight by pulling it towards you.
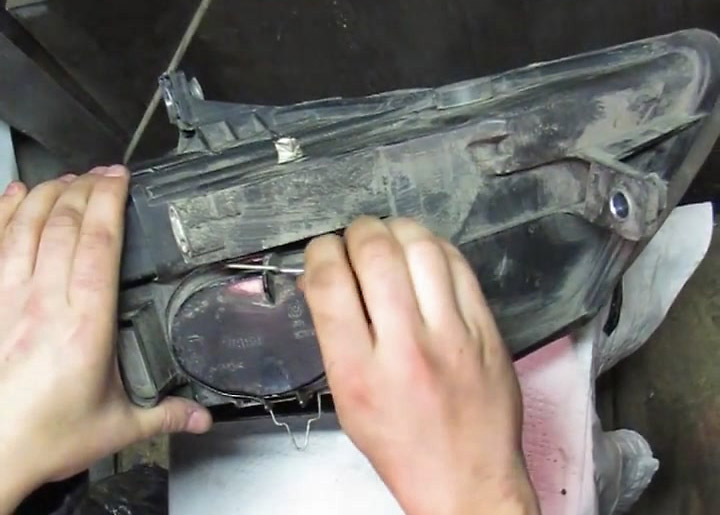
7. Fold out the bracket at the back of the headlamp housing.
8. Pull the cover together with the lamp ignition unit away from the bracket. Do this carefully, as there are wires to the cover that need to be disconnected.
Note:
Do not remove the ignition unit from the cover without needing to replace it.
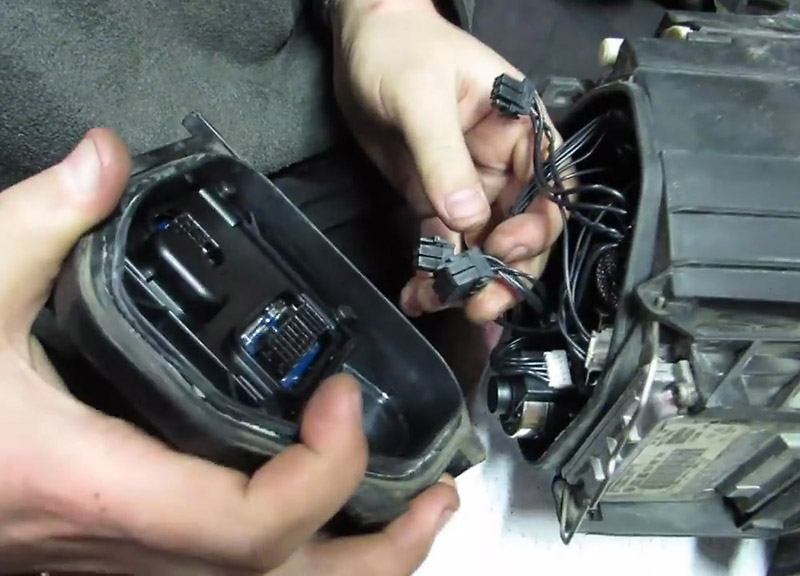
9. Disconnect all wire terminals from the headlamp cover.
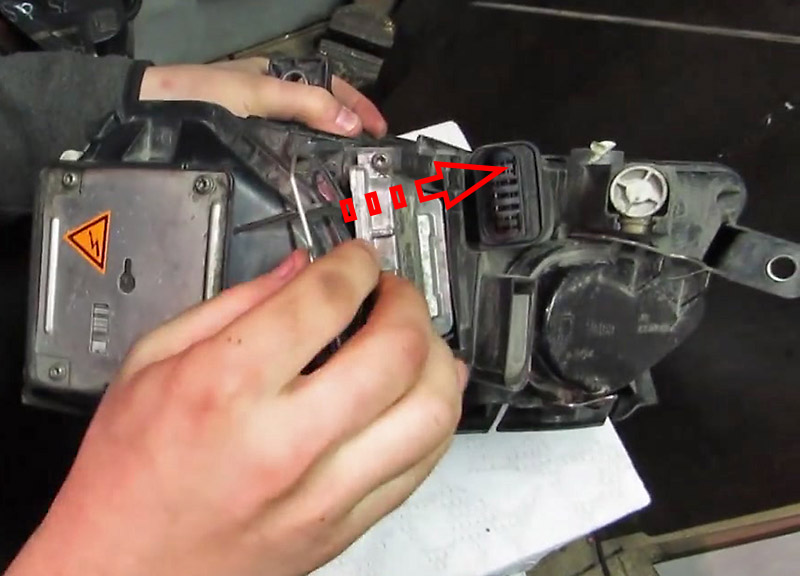
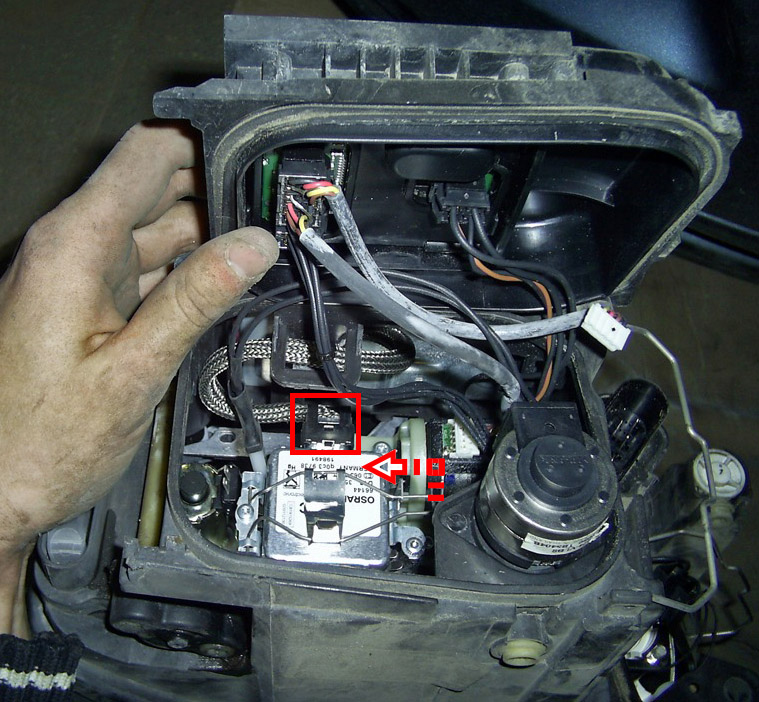
10. Further, there are two options depending on the version.
Disconnect the terminal of the wires suitable for the lamp (highlighted by a frame) and flip the latch (movement is shown by an angled arrow).
Alternatively, stick your hand into the headlight housing, turn the square base of the lamp counterclockwise, pull out the lamp and disconnect it from the wire.
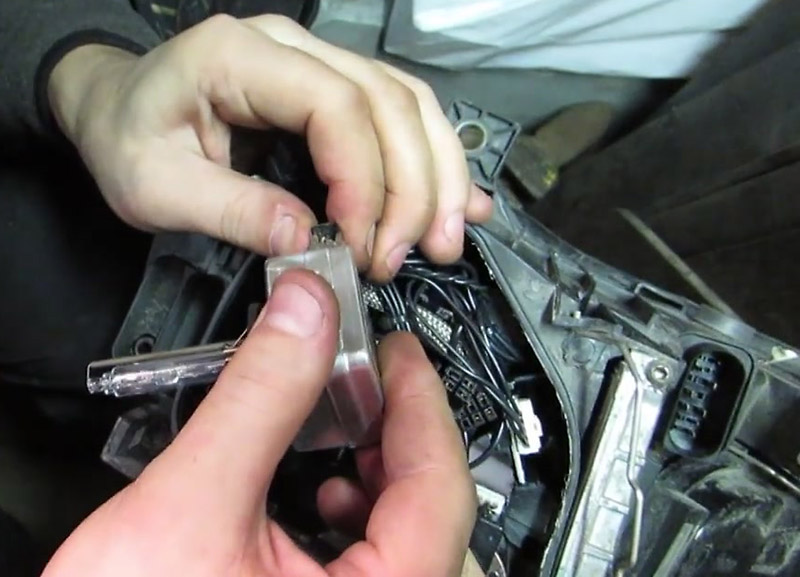
11. Remove the low beam bulb and replace it with a new one if necessary. Remember not to touch the lamp with bare hands.
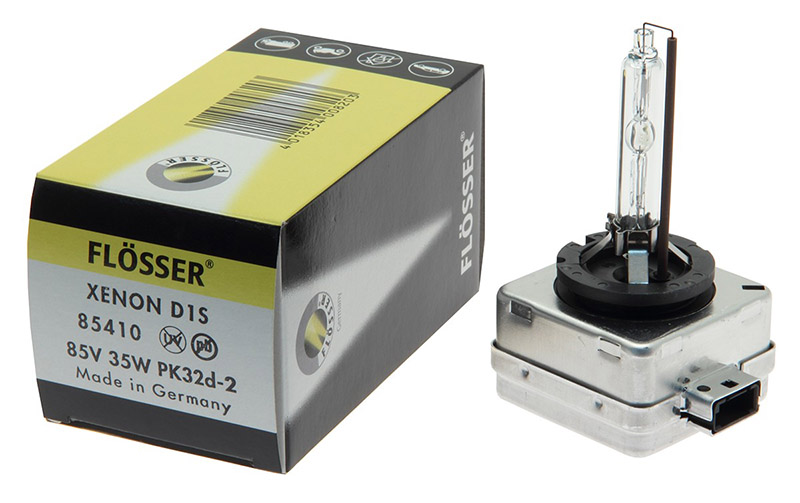
Gas discharge lamp (xenon) D1S-12V 85W/35W
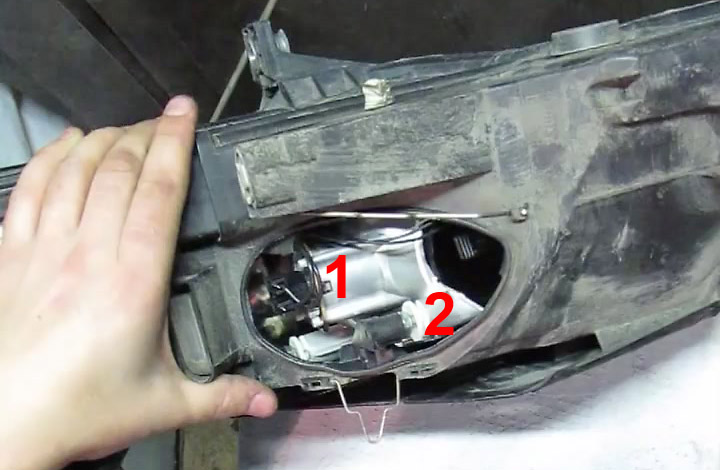
12. To replace the parking light bulb and the cornering light bulb, open the oval cover on the back of the headlamp housing. To do this, flip open the two latches at the top and bottom of the cover.
13. Remove the cornering light bulb (1) or parking light bulb (2) from their seats, disconnect them from the sockets and replace with new ones.
A conventional halogen lamp, which is used in halogen headlights (VAG N10320102), is used as a turn signal lamp.
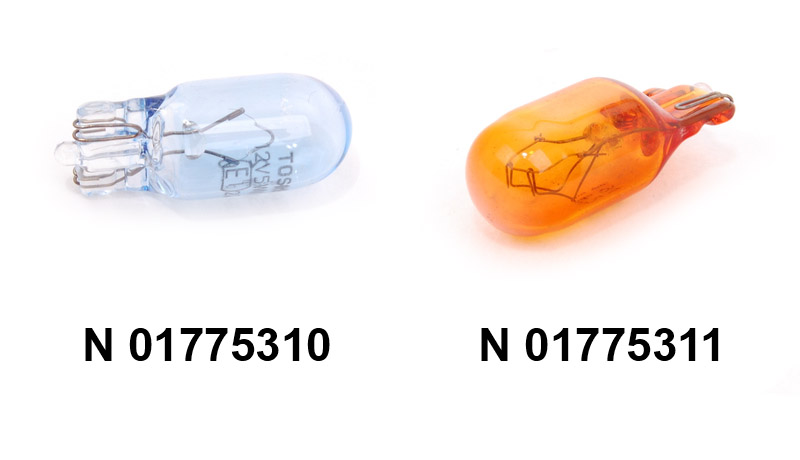
Parking light bulb for headlamp with xenon light (VAG N01775310/N01775311)
14. Install the lamps and all other parts in reverse order.
15. Check the operation of the headlight, including all its functions.
16. Check the setting of the headlights, adjust if necessary.
Headlight lens cleaning or headlight unit repair/replacement Volkswagen Passat B6
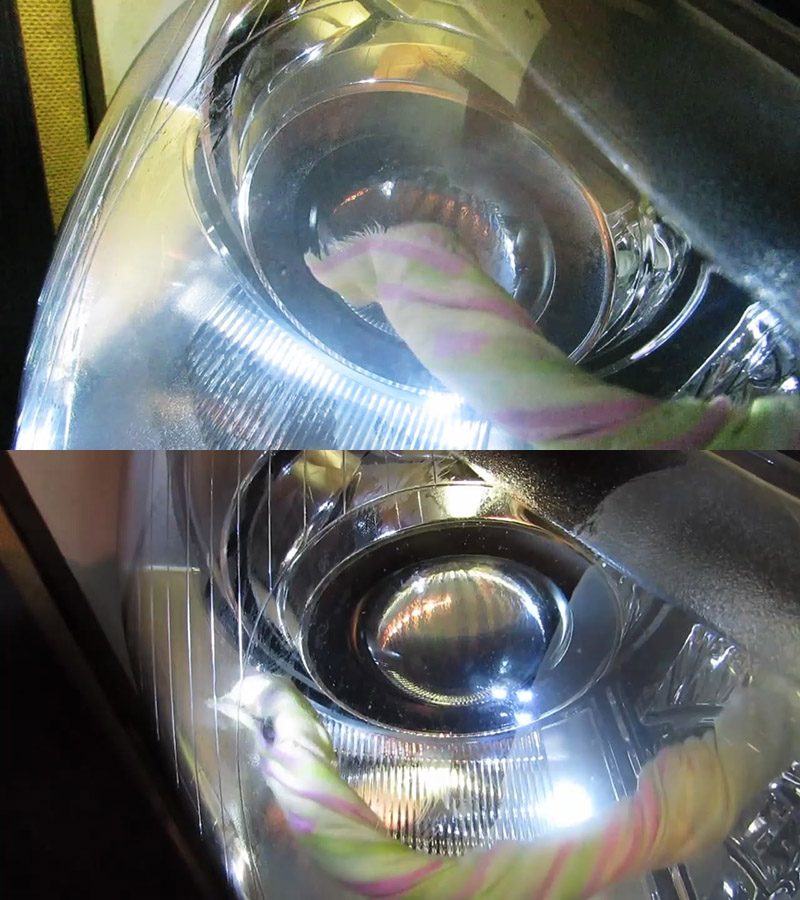
1. To enhance the effect of lamp replacement, you can try cleaning the lens and headlight cover. To do this, you need to make a long hand mop from a wire tightly wrapped in a towel.

2. Insert the squeegee through the lamp mounting hole, bending at different angles, wipe the lens and headlight cover.
3. It should be noted that it is impossible to wipe everything with a mop without disassembling the headlight housing (it is non-separable in design). In some cases, users turn to an additional cleaning method. All lamps and headlight electrical units are removed, the wires are insulated and warm distilled water is poured into the headlamp housing with the addition of a cleaning degreaser. Then the water is drained and the headlamp is dried in the most thorough way. This can be done either in the oven or naturally.
Warning:
This kind of cleaning is inevitably associated with the risk of water ingress and incomplete drying of electrical contacts. Pay particular attention to drying the headlight. All operations you perform at your own peril and risk!
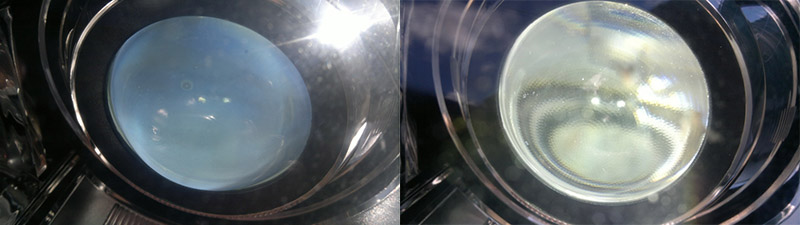
Lens before and after washing the headlight
4. Repair or replace the headlamp assembly.
Note:
If replacing the bulbs and wiping / washing the headlamp does not help to solve the problem of weak head light, then either a complete replacement of the headlight assembly is necessary, or its disassembly and subsequent replacement of the lens reflectors. This disassembly is not provided by the manufacturer. The headlight will have to either cut or peel off the cover. This is a very time-consuming and time-consuming procedure that requires good technical training. It is carried out incl. specialized workshops.
The article is missing:
- Photo of the instrument
- High-quality photos of repair
Source: carpedia.club